How to Write a Netlify Post-Deploy Function in Golang
If you are hosting your website on Netlify.com, the Netlify Functions feature has the potential to add a ton of functionality to your…
If you are hosting your website on Netlify.com, the Netlify Functions feature has the potential to add a ton of functionality to your JAMStack site for no additional cost. Netlify functions are simply serverless functions that can be triggered either by submitting data to a certain URL on your site or by triggered events in your site’s build process.
Recently I needed a way to execute some additional functionality after a successful deployment of my Hugo site hosted on Netlify. To accomplish this, I used the post-deploy Netlify function and it worked great!
My Use Case
I’ve been working on a tool that will automatically take any new post I write on my website and post it to medium.com as a draft. I’ve written a few articles about this tool and you can read them here and here. The last step I needed to complete was the automation that would post my new article when I published it. Previously I had been running the tool manually, and while this worked fine, I am incredibly lazy and just wanted it to work without even thinking about it.
Creating the Netlify Function
Netlify’s documentation on Netlify Functions is OK, but not great. It took some jumping around and some additional digging to figure out everything I needed to do, but eventually, I figured it all out. Here are the steps I completed as well as some helpful “missing documentation” I encountered along the way.
Create the File — Naming is important!
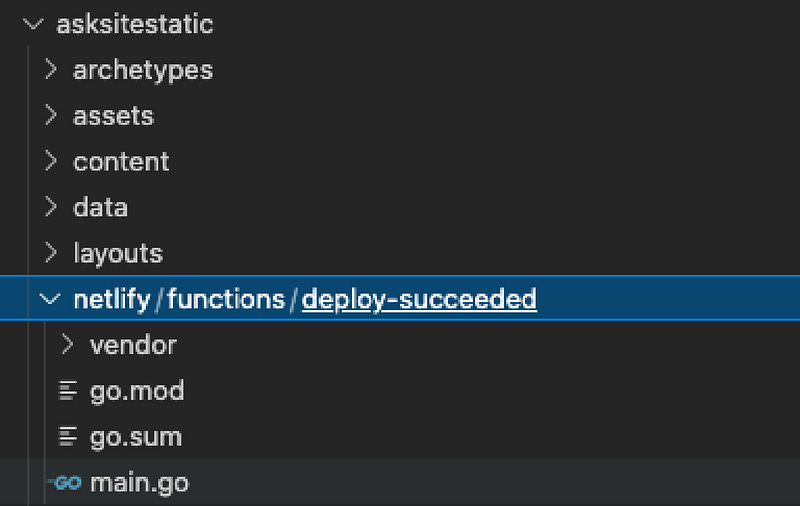
According to the Netlify Functions documentation, if I want a function to fire after a successful deployment, I need to put the function in the path netlify/functions/deploy-success. Since I’m writing this in Go, I should put my main.go file as well as any other necessary dependencies in this directory. This is a naming convention created by Netlify to make it so you don’t have to register functions with the build system.
After I created my empty main.go file, I also initialized the directory as a Go module. This is not in the docs, but it is the way most Go apps are written, so it seemed like the right thing to do.
go mod init github.com/askcloudarchitech/askcloudarchitech/netlify/functions/deploy-suceeded
Writing the execution steps
This is the contents of my main.go file. I will explain each line below.
Lines 1–11 — Set the package as main and add any necessary imports. If you are using VScode with the Go tools installed, it will add many of these imports automatically, but you will need most of these (minus the
mediumautopostpackage which is my custom code for my functionality)Lines 13–19 — For my specific functionality, I needed this function to only run for production deployments (and not test environments). To accomplish this, I needed to get the
payload.contextproperty from the body of the request which kicks off this function. These two Structs represent the data structure of the request body which will get me that one value. NOTE: see the next section for more on this. This part is not documented anywhere and I had to just figure it out.Line 21 — The handler function is from the Netlify functions go example. It is the function that is called by AWS lambda when this function executes.
Lines 23–24 — Unmarshal the request body to the Request body type that I mentioned above. Again, see below for more on this.
Lines 26–30 — This is the actual functionality of my
mediumautoposttool. If this is a production build, run the medium auto-post tool, otherwise print a message indicating that the step was skipped.Lines 32–36 — Send back a 200 response indicating success.
Lines 39–41 — This is the main function as defined in the example on the Netlify site listed above.
Debugging the Payload
Like I mentioned above, it took me forever to figure out how to get all the details of the deployment. I knew the details had to be available, but the docs really don’t mention much about it. It ends up that the request argument passed to the handler function contains a ton of details about the build. Unfortunately, since Go is a strongly typed language, you can’t really just access the JSON data without Unmarshaling it to your own type. In order to unmarshal, you need to know the structure (it’s a catch 22). So… the Gist below contains all the details of the request body so you don’t have to do it yourself. You can thank me later :)
Setting your Environment Variables
One last setup step before firing this thing up! If your function requires access to any environment variables, you need to set them in the Netlify settings page on the Netlify admin website. Just log into the Netlify admin site, click on your site, then go to /settings/deploys#environment.
Checking for Proper Execution
Alright, now you can go ahead and commit your changes to Github. After pushing the changes up to your main branch, head back to the Netlify admin site and check your deployment logs, you should see something like the info below indicating that a new function was created and deployed.
12:11:25 AM: ────────────────────────────────────────────────────────────────
12:11:25 AM: 2. Functions bundling
12:11:25 AM: ────────────────────────────────────────────────────────────────
12:11:25 AM:
12:11:25 AM: Packaging Functions from netlify/functions directory:
12:11:25 AM: - deploy-succeeded/main.go
12:11:25 AM:
12:11:32 AM:
12:11:32 AM: (Functions bundling completed in 7.5s)
12:11:32 AM:
12:11:32 AM: ────────────────────────────────────────────────────────────────
12:11:32 AM: 3. Deploy site
12:11:32 AM: ────────────────────────────────────────────────────────────────
12:11:32 AM:
12:11:32 AM: Starting to deploy site from 'asksitestatic/public'
12:11:33 AM: Creating deploy tree
12:11:33 AM: Creating deploy upload records
12:11:33 AM: 0 new files to upload
12:11:33 AM: 1 new functions to upload
12:11:39 AM: Site deploy was successfully initiated
12:11:39 AM: If all went well you should also be able to go to the Functions menu at the top and see that your function has successfully run.
Happy Coding!


