How to Download Files from Github: 4 Easy Methods
If you’re new to coding or just really like to find cool software on the web, you’ve probably come across GitHub
If you’re new to coding or just really like to find cool software on the web, you’ve probably come across search results for stuff on GitHub. Without going too deep into the topic, GitHub is a website where developers can share their code with the world as well as keep track of the history of their projects.
And since GitHub is completely free to join at the individual level, it’s kinda become the de facto location for everyone to house the code for their software projects.
But if you’ve never used it before there’s one huge problem. If you find some awesome project or file on GitHub that you want to use, how… exactly do you download the stuff!?
It ends up that there are a bunch of ways to download files from GitHub and each of them has upsides and downsides. Today I’m going to show you four different ways to download files from GitHub as well as the benefits and downsides of each approach.
Ready? Let’s get started with option number 1.
The Raw File Method
This method only really makes sense if you just want to copy a single file from GitHub and not a whole project. First, find the file on GitHub that you want to download.
Once you are on the file view page, look to the right-hand side and find the “raw” button. Once you click this, the file will open in a new tab in your browser, and it won’t have all the GitHub UI wrapped around it.
Now that just the file is visible on the screen, you can easily save it by going to the file menu on your browser and choosing “save as”. Just choose where you want to save the file, hit save then you are all set.
Like I said just a second ago, this option is great if you just found a single file, and you want a copy of it. Beyond that though, this option isn’t very useful.
The Release Download Method
So, let’s move on to option two for downloading files from GitHub. This is called the release download option. This one allows you to download a whole codebase and sometimes a working version of the compiled program for a specific version number of the project.
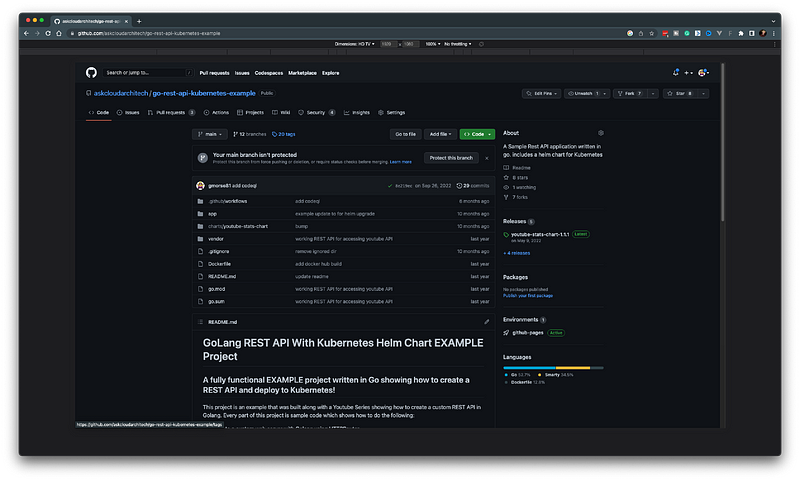
To do this, first, go to the top-level directory of the project you want to download. If you aren’t already on the top-level page, just click the project name in the top left corner of the screen.
Once you’re there, click on the “tags” link near the top center of the page.
This will open up a list of all the tags and release for this project. If you aren’t familiar, programmers will often tag their projects with version numbers to keep track of progress. These tags appear here on this screen like snapshots of the program.
On this page, the top-most tag is usually the newest version. Right below the name of the tag, you’ll see a link to download a zip file that contains the entire project. Click that link and wait for it to finish downloading.
After it's done just unzip the file, and now you have the entire project on your machine.
The “release download” option is great if you just want to grab the whole project as it exists right now or if you want to download a previous version of the code. It’s the least complicated way to get a whole project without any additional programs or tools.
A Bit About Git
But, as I mentioned earlier, GitHub is a place where developers store not just the most recent versions of their code, but instead, the entire history of the code based and every change that has ever happened.
You see, GitHub isn’t just “Google Drive for developers”. GitHub is actually a remote copy of what’s known as a git repository. Git is a tool that developers use to track changes and collaborate on software projects. It keeps track of every single change ever made to a code base as well as who made the change and notes provided by the person who made that change.
The next two methods for downloading files from GitHub step into using Git on your computer to pull down the project and its whole history. These last two methods are what you should do if you are a developer or learning to write code as it will be an absolutely necessary skill in your day-to-day life.
Before we get into the next two, you will need a few things. You don’t necessarily need to stop and do these right now, but they will be required if you’re following along.
First, you will need to have git installed on your computer
Second, you will need a free GitHub account
Third, you will need to set up an SSH key and add your public key to your GitHub account.
The Clone Method
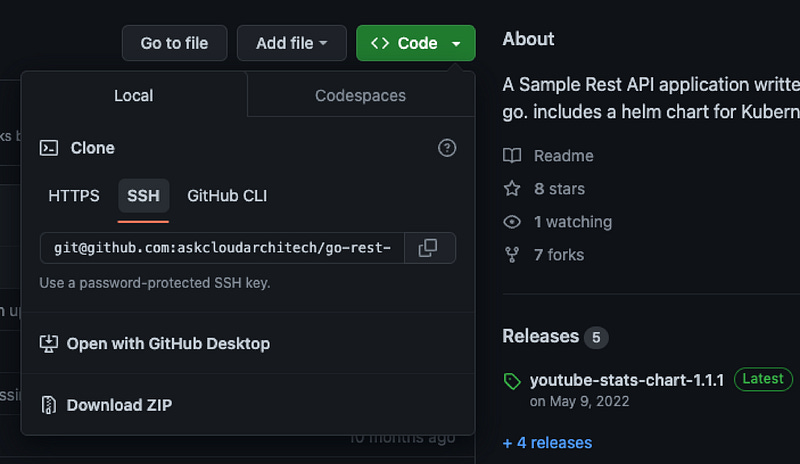
So… the next method for downloading files from GitHub is called cloning. Once you have git installed on your machine, this method is also super easy. First, go back to the top-level directory of any project on GitHub and hit the green “code” button in the top right of the screen.
From there, choose the SSH option then hit the little copy button to the right of the repo address.
After you’ve copied the repo details, open up a terminal on your computer and change directories to a place where you want to keep your projects. Note that you don’t need to make an empty folder for the code, git will do that for you. Just navigate to a place where you want that folder to live.
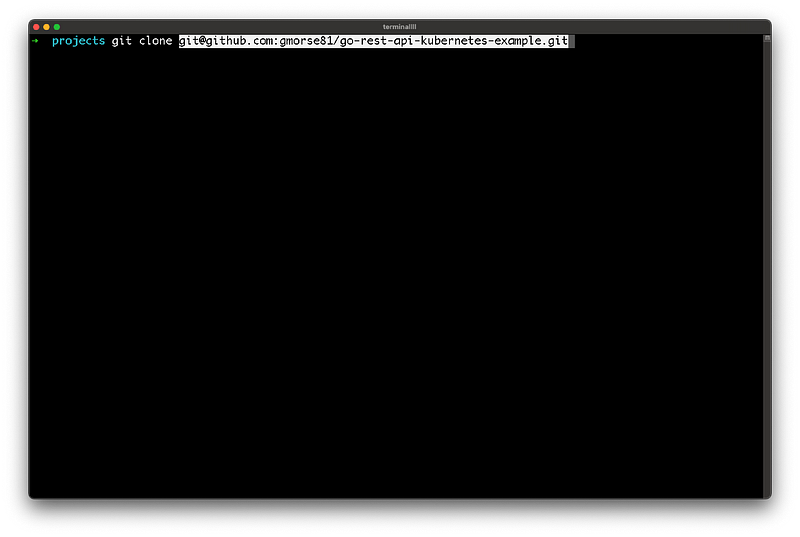
From there, type git clone and then paste the repo details that you copied a second ago and hit enter.
If everything goes well, you should see git spit out a bunch of stuff as it pulls down the entire repo to your computer.
Now you should see that git has created a new directory with the same name as the project you wanted and inside that directory will be all the source code of the project.
This cloning method is great if you want to pull down a whole project and poke around. The added bonus of using git to clone the project as opposed to just downloading the zip file is that at any point you can use the command git pull to pull down any changes that have been made to the project. There are tons of amazing things you can do with git, but that’s easily a topic for another post or even a set of posts.
The Fork Method
So now it’s time for the final method for downloading files from GitHub. This method is called “the fork method” and it’s designed for developers who don’t just want to get the files from a GitHub project but instead also want to make changes to the files and potentially push them back up to GitHub.
Forking a project on GitHub is just another way of saying “make my own copy”. When you fork a project you’ll be taking a project that is owned by someone else and making a copy of it on your GitHub account instead. I’ll get into the benefits of this after we go through how to do it.
So back to the root of the project on GitHub, instead of hitting the green “code” button, this time hit the fork button in the very top right.
The next screen that will appear will ask you to choose a GitHub account and repo name for your fork. If you only have one GitHub account there will be only one option here. I would also recommend leaving the repository name alone since it’s a copy of the original one created by the owner.
In most cases, you just need to hit the green “create fork” button at the bottom
Now just wait a few seconds as GitHub makes your copy.
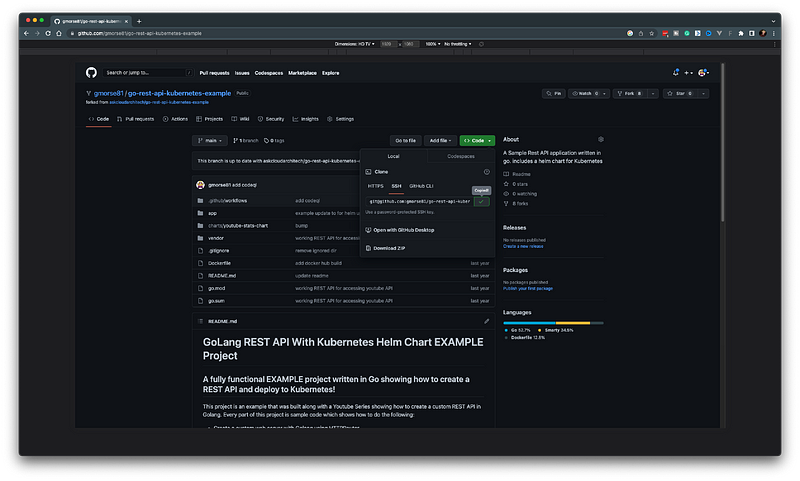
Now so that you can see what we did here — this is the original project that I forked.
And this is the forked copy. You can see that the owner changed, and it even shows that it is a fork of another project which is a nice and easy way to get back to the original if you need to.
Now that you have your own copy, go to the “code” button on the right-hand side and copy the repo address just like we did before in the clone method
Then in your terminal again, type git clone and paste the repo address.
Now you have a clone of your fork of the original project.
So, what’s the point of all of that? Well, as I briefly mentioned earlier, if you want to actually make changes to this code and potentially push it back up to GitHub, you need to follow this fork method. The reason for this is that while you have permission to clone someone else’s repo, you don’t have permission to publish code to someone else’s repo.
By making a fork, then cloning the forked copy, you can now make changes and use git to push those changes back up to your copy since you have permission to push code to your own copy.
Beyond that, if you make a change that you think would be useful to the original owner of the project, you can now use GitHub’s built-in tools to request that the original owner pull your code in.
I made a whole video about how to contribute to open-source projects that cover this topic from end to end. You can check it out here.


